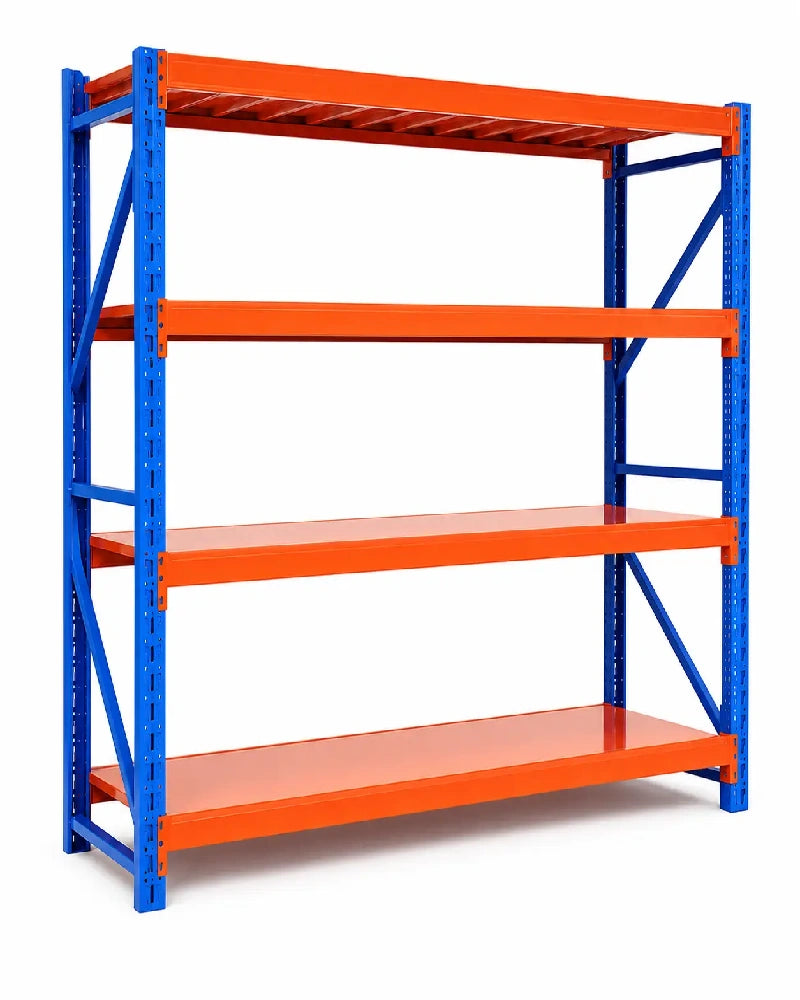


Heavy-duty shelving dimensions are usually listed as width × depth × height, but those three numbers do not tell the whole fit story. Before buying, compare the unit’s full assembled footprint, usable shelf area, shelf spacing and clearance around the installation site. Measure in both millimetres and inches when comparing Australian and US listings, and use the exact product drawing rather than a category label or marketing image.
This guide explains what each dimension controls, how to measure your space and stored items, and which specification details to verify before you choose a shelving unit.
What width, depth and height actually mean
Product listings commonly present dimensions in the order width × depth × height, although some sellers use a different order. Check the labels beside the numbers instead of assuming the sequence.
- Width is the horizontal span along the wall or storage run. It affects how many containers fit across each level and whether the unit clears doors, columns and corners.
- Depth is the distance from the front of the unit to the back. It affects container support, reach, aisle space and how far the shelving projects into a garage, workshop or stockroom.
- Height is the assembled vertical dimension. It affects total storage volume, access to upper levels and clearance below ceilings, lights, pipes, door tracks and other fixed services.
Dimensions may be described as nominal, external, overall or usable. Those terms are not interchangeable. A nominal size is a convenient product class; the assembled frame may be slightly different. External dimensions describe the complete unit, while usable dimensions describe the clear space available for stored items.
Start with the full external footprint
The first fit test is the unit’s complete assembled width and depth. Posts, feet, braces, connectors or protective caps can extend beyond the shelf deck. If a listing gives only panel dimensions, ask for the full assembled footprint before ordering.
Mark that footprint on the floor with removable painter’s tape. Then use the area normally: open nearby doors and drawers, move your largest container through the aisle, park any vehicle in its usual position and confirm access to outlets, panels, shutoffs and controls. A unit that fits an empty floor plan may still interrupt everyday movement.
Do not choose an aisle clearance from a generic rule alone. People, carts, doors, vehicles and local requirements vary. Test your real movement pattern and follow any applicable workplace, building or access rules.
How shelving width affects storage and layout
Width determines how much uninterrupted wall space the frame needs and how items can be grouped across a shelf level. A wider bay may hold more containers side by side, but it can be harder to place around doors, columns or services. Two narrower units may provide more layout flexibility, although their combined external width can include additional posts and gaps.
Measure the wall at floor, middle and upper levels. Skirting boards, sloping walls, pipes and projecting hardware can change the available width. Also check the route from the delivery point to the final location; long components must pass through gates, doorways, corners, stairs and lifts.
Width checklist
- Record the clear wall width after excluding fixed obstacles.
- Compare it with the exact assembled width, including feet and connectors.
- Measure the outside width of your largest bins, including handles and latches.
- Decide whether one wide bay or several narrower units works better around obstacles.
- Confirm that packaged components can reach the installation area.
How shelf depth changes access
Depth is often the dimension that determines whether a shelf works in a real room. A deeper unit can support larger containers, but it occupies more floor space and can make items at the back harder to see or reach. A shallower unit preserves aisle space but may not fully support bulky bins or equipment.
Measure both the base and the widest outside point of each important item. A tote may have a narrow base but a lid or handle that projects farther. Compare those measurements with the usable shelf surface and follow the shelving and container instructions; do not assume that overhang is acceptable.
For frequently used supplies, a single visible row is often easier to manage than two deep rows. Reserve deeper storage for items that genuinely need it, and avoid creating a layout where a heavy object must be moved to reach another item.
Depth checklist
- Measure the item base, outside depth and access direction.
- Verify usable shelf depth and full frame depth separately.
- Tape the complete footprint on the floor.
- Test walkways, doors, drawers, vehicle movement and material-handling paths.
- Keep objects within the supported area specified for the exact shelf.
How height affects access and usable levels
Height can add storage volume without taking more floor area, but only when the upper levels remain practical and the unit fits below every overhead obstacle. Measure to the lowest relevant point, not merely to the ceiling. Include lights, pipes, beams, sprinklers, door tracks, motors and any required service clearance.
External height is different from shelf spacing. To check whether a tall container fits, measure the clear vertical opening between the shelf surface and the structure above it. If levels are adjustable, confirm the permitted adjustment positions and whether changing one opening affects the others.
Plan how items will be placed and removed. Do not rely on an unsafe reach or improvised climbing. Follow the product instructions for assembly, loading and anchoring, and use suitable access equipment or a qualified professional where the installation or workplace requires it.
Height checklist
- Measure to the lowest overhead obstacle.
- Check the full assembled height and any assembly clearance required.
- Measure the tallest item, including lids and handles.
- Verify each usable shelf opening, not only the unit height.
- Plan safe access to every level before assigning storage.
Convert metric and imperial dimensions carefully
Australian listings usually emphasise millimetres or centimetres, while US listings often use inches or feet. The exact conversion is 1 inch = 25.4 mm. For initial comparison, you can convert inches to millimetres by multiplying by 25.4, or millimetres to inches by dividing by 25.4.
Use conversions to compare listings, but retain the seller’s original specification for the final fit decision. Rounding can turn a close fit into a conflict. If the available space is tight, allow for measurement tolerance, wall irregularities and any projecting frame parts rather than ordering a unit that matches the opening exactly on paper.
Usable dimensions versus advertised dimensions
A useful specification sheet should let you distinguish the space occupied by the unit from the space available for storage. Before buying, look for or request:
- assembled external width, depth and height;
- usable shelf width and depth;
- clear opening height between levels;
- adjustment increments or permitted shelf positions;
- dimensions of posts, feet or components that project beyond the deck;
- packaged dimensions for delivery-route planning; and
- the exact configuration to which any load information applies.
Size and load capacity are separate decisions. A wider, deeper or taller shelf is not automatically stronger. Review the exact model’s load information, assembly instructions and loading conditions. The garage shelving load-capacity guide explains how to interpret per-level and total-unit figures without treating them as interchangeable.
A practical six-step dimension check
- List the items. Measure the largest and most frequently used containers, tools or cartons, including lids, handles and the space needed to remove them.
- Measure the site. Record clear width, floor depth and overhead height after excluding fixed obstacles and required access areas.
- Check the route. Measure gates, doors, corners, stairs and the area needed to assemble or position the unit.
- Compare exact specifications. Separate external frame dimensions from usable shelf dimensions and shelf-opening height.
- Tape the footprint. Test normal movement, doors and access with the space in everyday use.
- Review instructions. Confirm assembly, loading, levelling, anchoring and clearance requirements for the exact model and location.
If you are still comparing construction as well as size, read what makes a heavy-duty shelf strong. It covers the frame, decking, connections and bracing that dimensions alone cannot evaluate.
Frequently asked questions
In what order are shelving dimensions listed?
They are often shown as width × depth × height, but formats vary. Read the labels or dimension drawing beside the numbers before comparing products.
Are shelf dimensions external or usable?
They may be either. External dimensions describe the space the frame occupies; usable dimensions describe the storage surface or clear opening. Verify both for the exact product.
Should shelving match the wall width exactly?
No. Allow for skirting, uneven walls, connectors, assembly access and any clearance required by the instructions or local rules. A tape test can expose conflicts before purchase.
How deep should heavy-duty shelving be?
Choose depth from the items and room outward. The shelf must support the stored items as intended while preserving practical access, doors, walkways and equipment movement.
Does a taller shelving unit provide more capacity?
It may provide more storage volume, but height does not prove load capacity. Check usable openings, safe access, stability and the exact model’s instructions and ratings.
Can I convert inches to millimetres for comparison?
Yes. Multiply inches by 25.4 to get millimetres. Keep the original specification and avoid relying on rounded values when the fit is close.
Do adjustable shelves change the unit’s external height?
Usually they change the vertical openings between levels rather than the overall frame height, but designs differ. Confirm the permitted positions and assembled dimensions for the exact model.
Choose from verified measurements
The right shelving dimensions connect three sets of facts: the assembled frame, the usable shelf space and the room in normal use. Measure all three, tape the footprint and verify the exact product instructions before ordering.
When you are ready to compare current options, browse the Heavy-Duty Shelving collection. Check each live product page for its current dimensions, configuration, price and availability; do not assume that every size or specification is offered.
Need help choosing?
Find the right storage solution for your space.
Tell us about your room, workspace, quantity, or project requirements and our team will help you compare suitable options.