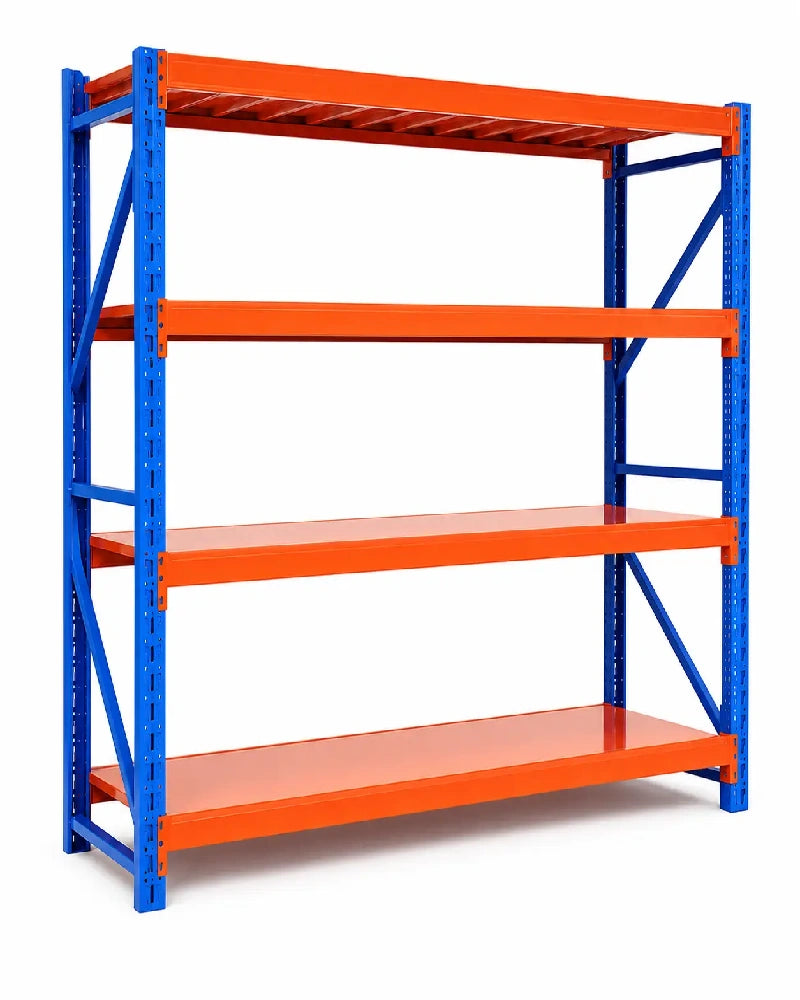


Adjustable garage shelves are most useful when their spacing matches the items you actually store—not when every shelf is set at the same height. For most garages, the right level of flexibility means enough adjustment points to create a few short openings for small bins, medium openings for tools and supplies, and one or two taller openings for bulky gear. You do not need to move shelves every week; you need a system that can adapt when your storage mix changes.
Start with your storage, not the number of adjustment slots
A rack can offer many adjustment positions and still be a poor fit if its overall width, depth, height, or shelf construction does not suit your garage. Before comparing mechanisms, list what will live on the rack and group those items by height.
- Short items: hand tools, small parts cases, cleaning cloths, and shallow containers.
- Medium items: lidded storage bins, toolboxes, garden supplies, and sports equipment.
- Tall items: coolers, camping equipment, upright appliances, or large containers that fit within the rack's stated dimensions.
- Frequently changing items: seasonal decorations, project materials, and gear that rotates during the year.
Measure the containers themselves, including lids, handles, wheels, and anything that projects above the main body. Then allow enough hand clearance to lift each item out without scraping the shelf above. The required clearance depends on the container and how you access it, so a quick physical test is more reliable than a universal rule.
How much adjustability is enough?
For most households, flexibility is sufficient when the shelving can support three practical zones: compact storage, everyday storage, and bulky storage. The exact adjustment increment matters less than whether those zones can be created without wasting a large amount of vertical space.
Choose fine adjustment when item heights vary closely
Closer adjustment positions can be valuable when you use several containers with only small height differences. They let you reduce unused air above short bins and may help fit another useful shelf level within the rack's overall height. This is especially relevant for small garages where floor space is limited.
Choose simple adjustment when your categories are stable
If you store the same medium and large containers year-round, you may not benefit from the finest possible spacing. A straightforward system with fewer practical positions can be easier to assemble and reconfigure. Check the product instructions to understand how each shelf is supported and what must be removed before changing its position.
Keep one flexible zone for future changes
Instead of making every opening highly specialized, reserve one area for changing needs. A taller lower opening can accommodate a new bin or bulky seasonal item, while upper shelves can hold lighter, less frequently used items where appropriate. Always follow the product's load, placement, assembly, and anchoring instructions.
Adjustable spacing does not change the rack's rated limits
Moving a shelf changes the size of the opening; it does not automatically increase the shelf's load rating, total rack rating, stability, or compatibility with accessories. Ratings may depend on correct assembly, shelf position, evenly distributed loading, anchoring, floor condition, and other model-specific requirements.
Before buying, verify the current product documentation for:
- the rating for each shelf and for the complete unit;
- whether ratings assume evenly distributed loads;
- approved shelf positions and the permitted adjustment method;
- deck, beam, connector, and frame compatibility;
- anchoring, wall-clearance, or floor requirements;
- instructions for reconfiguring an assembled rack.
Do not move a loaded shelf. Unload the rack as directed, keep components supported, and follow the manufacturer's sequence. If the installation involves wall structure, electrical services, unusual loads, or local safety requirements, consult an appropriately qualified professional.
Five buying checks that matter more than “fully adjustable”
1. Overall dimensions
Confirm the complete assembled footprint, not just the shelf-board dimensions. Measure usable wall width, rack depth, ceiling height, skirting or baseboards, garage-door tracks, outlets, doors, windows, and vehicle movement. Our garage measurement guide provides a practical checklist.
2. Usable opening height
Subtract the thickness of the decks and supporting beams from the total frame height. Count the openings that will remain after you place the shelves, then compare those openings with your measured item groups. Product photos can make gaps look larger than they are, so rely on current dimensions and instructions.
3. Adjustment process
Some systems use boltless connections, clips, pins, brackets, or bolted components. Each has a different reconfiguration process. Check whether tools are needed, whether the unit must be partially disassembled, and whether connectors are designed to be reused. “Adjustable” should describe an approved configuration—not an improvised modification.
4. Shelf surface and container fit
The surface should support the containers you plan to use without unstable edges, unsuitable gaps, or interference with handles and wheels. Wire and solid decking have different trade-offs for small-item stability, airflow, spill behaviour, and cleaning. Confirm the current model's deck design rather than assuming all adjustable racks use the same surface.
5. Long-term layout
Think about how the garage may change over the next few years. New tools, children's equipment, hobby supplies, or seasonal storage may require different openings. A useful adjustable rack should accommodate likely changes without forcing you to replace all your containers or sacrifice access to everyday items.
A simple way to plan shelf spacing
- Inventory: list the items and containers you intend to place on the rack.
- Measure: record the outside height, width, and depth of each item, including handles and lids.
- Group: sort items into short, medium, and tall categories.
- Prioritize: place everyday items between comfortable knee and shoulder height where practical; reserve less convenient positions for lighter, occasional-use items.
- Mock up: mark the rack footprint with removable painter's tape and test access around the car, doors, and walkway.
- Compare: use the product's actual adjustment positions and usable internal dimensions to sketch a proposed shelf layout.
- Verify: read the current assembly, loading, anchoring, and reconfiguration instructions before purchase and installation.
When adjustable shelving is worth paying for
Adjustability is most valuable when your container heights vary, your garage is compact, or your storage changes seasonally. It can reduce wasted vertical space and extend the useful life of a layout. It is less important when you store a small number of consistently sized items and rarely reorganize them.
The decision is therefore not “adjustable or not” in isolation. Compare the complete rack: dimensions, shelf surface, approved positions, loading conditions, reconfiguration effort, and fit within the garage. For a broader comparison of the two approaches, read Adjustable Shelving vs Fixed Shelving.
Choose garage shelving around your measured layout
Once you know the openings you need, compare the current options in the Garage Shelving collection. Check each product page and its instructions for exact dimensions, adjustment positions, loading conditions, included components, installation requirements, availability, and delivery details before ordering.
Frequently asked questions
Are more adjustment slots always better?
No. More positions can help fine-tune spacing, but overall dimensions, usable openings, shelf construction, approved loading conditions, and ease of reconfiguration also matter. Choose a rack that fits your measured storage plan.
How often should I move adjustable garage shelves?
There is no required schedule. Reconfigure when your storage mix changes or when the current layout wastes space or makes access difficult. Follow the product instructions and completely unload affected levels before moving components.
Should the tallest items go on the bottom?
A lower opening can be practical for bulky items, but placement also depends on item weight, stability, lifting method, floor condition, and the manufacturer's instructions. Keep the whole rack stable and do not exceed any model-specific rating.
Can I add another shelf later?
Only if the manufacturer confirms that the exact shelf, beams, connectors, and frame are compatible with your model and configuration. Do not substitute unverified parts or assume that a visually similar component is suitable.
Does adjustable shelving need to be anchored?
Requirements vary by product, height, load, location, floor, wall construction, and local conditions. Follow the current product instructions and applicable local rules. Seek qualified advice if the anchoring method or structure is uncertain.
What measurements should I take before buying?
Measure the available wall width, total height, floor depth, vehicle and door movement, fixed obstacles, and the outside dimensions of your storage items. Then compare those measurements with the rack's complete assembled footprint and usable shelf openings.
Need help choosing?
Find the right storage solution for your space.
Tell us about your room, workspace, quantity, or project requirements and our team will help you compare suitable options.